oVirt - Open Source Virtualization
by Zois Roupas
oVirt - Open Source Virtualization
Before starting this post let me point out that I will not provide any kind of step-by-step guide of either centOS7 or oVirt installation as there are a lot of great tutorials that I’ve also used and didn’t face any problem. oVirt also has great documentation with detailed information on how to install and configure everything needed to have a working environment.
Introduction
After having decided my homelab setup which is documented in full detail in my previous post and with latest centOS7 server installed, everything was ready in order to proceed with the next step in mind. Virtualization!
I didn’t have to look around much because I already used oVirt 3.5 (yes I know, really really old version blah blah..but did the job) in a production environment and I was very pleased with the stability, performance and Web GUI simplicity that oVirt provides.
From the official site “oVirt is an open source server and desktop virtualization platform built on operating systems like CentOS and Red Hat Enterprise Linux.It uses KVM hypervisor and is built upon several other community projects, including libvirt, Gluster, PatternFly, and Ansible”. Some of the basic features are:
- Memory overcommit, page sharing and Thin provisioning
- iSCSI, NFS, FC, Gluster and local storage support
- Backups, snapshots, live migration and OVF import/export
- Remote console and Web-based admin & user portals
- CLI, Rest API, virtual isolated networks and vNIC profiles
Architecture
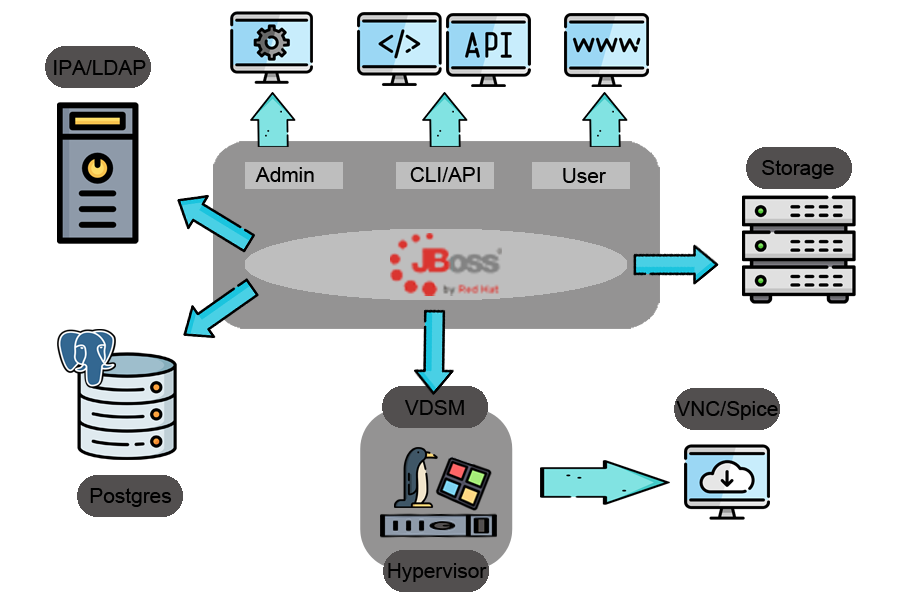
oVirt consists of two main components :
- Nodes: Machines that are acting as hypervirsors , based on CentOS,RHEL,Fedora that VM’s are running on.
- Engine: A machine that coordinates the cluster (like vSphere vCenter).
Due to the fact that I had one machine at my disposal I decided to install both engine and node on the same machine therefore I had to say goodbye to high availability and clustering but who needs those right?? (facepalm)
If you are interested in installing oVirt you have to be aware of the setup that you want to follow and limitations that are coming with it so take a good look at oVirt Installation Guide and oVirt Self-Hosted Engine Guide because the initial setup is very important in order to save time.
Accessing oVirt Management Interface
For those of you who have worked with version 3.5 in the past you will notice one major change and instead of the classic Green Color, oVirt now uses a Blue one which gives a fresh breath to the platform from the start!
And this freshness feeling was fullfilled after I logged in! I was blown away from the Dashboad added in version 4.
This Dashboard immediately gives you an overview of what is the status of your Host, your Global and Cluster Utilization. As you can see I have 1 Data center,1 Storage domain and 1 Node up and running hosting 22 created VMs of which 5 are currently running. Those 5 machines are only using 4% of CPU and 8.8GB of RAM from the available resources (and this is one of the reasons that I love Linux, you can do so much with so less!).There is a lot of overallocation but this is not critical as I know how many machines need to be simultaneously active, of course this should be carefuly monitored in a production environment.
Most of the oVirt settings are too specific so I will try to keep the remaining introduction short. In the next post(s) I will explain how I got deeper and deeper into trying to implement tools and machines that would help me manage my own infrastructure sufficiently, provide experience/training in latest technology trends and also the obstacles I had to bypass (and of course the struggle never stops!).
From the Hosts menu we can see a lot of information for the node itself, the VMs that are running on that node and even upgrade to the latest package. We can of course put our Node to Maintenance mode and get a Console in case the host is unreachable and we need to see what is exactly the problem.
I have created most of my VMs by using a centOS7 template and I store them locally. Instead of creating your own template, oVirt provides a Repository storage domain which can be used to import a lot of different operation systems like centOS 6/7 , Fedora 28-30, Ubuntu and Debian. In later posts I will provide more information on how I’m using cloud-init and Ansible to automate the VM creation procedure.
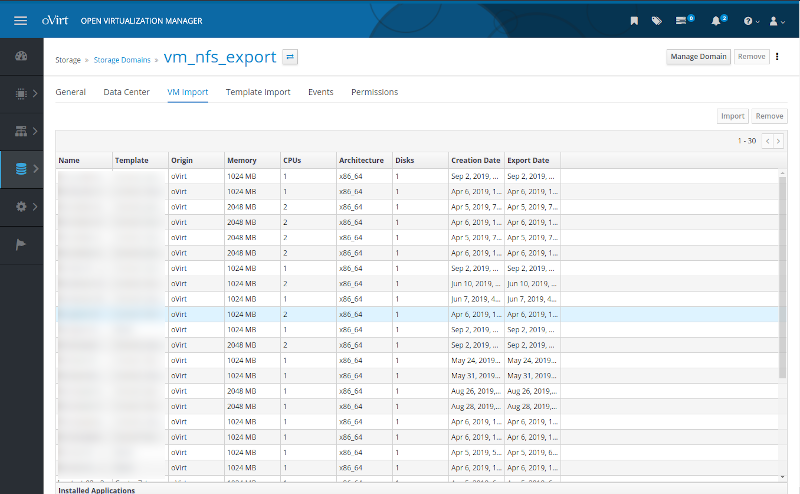
Last but not least I have created a new NFS domain export in order to backup my virtual machines but this is also going to be documented in detail at a later point!
Final Words
Thanks for reading and as Dr Wallace Breen says in Half-Life 2.. Be wise. Be safe. Be aware!
Subscribe via RSS


