Configure oVirt Engine on CentOS 7 - Part One
by Zois Roupas
Create a basic Cluster/Host and Configure a Storage Data and ISO Domain.
In my previous post I gave a general overview of my oVirt setup that followed the official installation guidelines and default suggested values.
So it’s time to provide a more detailed configuration on how to prepare everything, from a new cluster and host to ISO domain and local storage, in order to start creating new virtual machines.
In the second part of this tutorial I will also create a VM and save it as a template which will be used for all of our future machines! (Note to Future Me: Automate VM creation via the oVirt API!)
Let’s move on!
Prerequisites
- In case you want to configure ovirt-engine and host on the same machine as I did, you can login to the server that ovirt-engine is installed and in the hosts file add something like this (replace with your own IP and FQDN).
10.0.0.3 node1.homelab.homeThis FQDN will be used at a later point when asked to provide an IP address for the configured Host.
- Create the appropriate folders that will host the virtual hard disks, ovf files and ISO files. I am using /opt but you can use any other local or network path based on the configuration you have in mind,
:~$ mkdir /opt/{ovirt_data,ovirt_iso}
:~$ chown vdsm:kvm /opt/{ovirt_data,ovirt_iso}- We need an ISO file in order to setup our first VM after we finish the Cluster/Host configuration. For this step you can download your favorite distribution and either setup a Samba Share for /opt/ovirt_iso and upload iso files from your Windows machine or just scp them from your Unix workstation,
:~$ wget \
http://ftp.ntua.gr/pub/linux/centos/7.7.1908/isos/x86_64/CentOS-7-x86_64-Minimal-1908.iso
:~$ scp CentOS-7-x86_64-Minimal-1708.iso \
root@10.0.0.3:/opt/ovirt_iso/<id>/images/11111111-1111-1111-1111-111111111111/- As a final step I have also added an entry like the one below to my local hosts file,
##
# Host Database
#
# localhost is used to configure the loopback interface
# when the system is booting.  Do not change this entry.
##
127.0.0.1	localhost
10.0.0.3	ovirt.homelab.home
so as to be able to login to my oVirt endpoint without having to remember the IP of the oVirt host.
(NOTE: If you want to get rid of those uggly host entries, I will start doing so after this tutorial, checkout my post on how to create your own local DNS found here!)
oVirt Data Center/Cluster/Host Configuration
If you are the type of person that doesn’t start copying commands from random tutorials and wants to have the background behind any of the configuration documented below, then have a look on the official Data Centers and Clusters documentation before proceeding.
If you are like me though, open your favourite browser and type your oVirt endpoint, in my case https://ovirt.homelab.home/ovirt-engine/. Login with the admin account which was created during the initial engine setup.
As you can see from the screenshot above the connection is secure because as I have already documented in my previous posts, I have configured my own Self-Signed wildcard certificate and replaced the default one provided by oVirt installation with my own! If you want to do the same, just have a look here and here!
After our successful login we are presented with the Dashboard. This is where we will find a general overview of the status of your Host, our Global CPU/Memory/Storage information and Cluster Utilization.
You will have all the time in the world to wonder around so for now let’s cut to the chase!
From the left panel go to Compute -> Data Centers, select the Default and Remove it! Trust me!
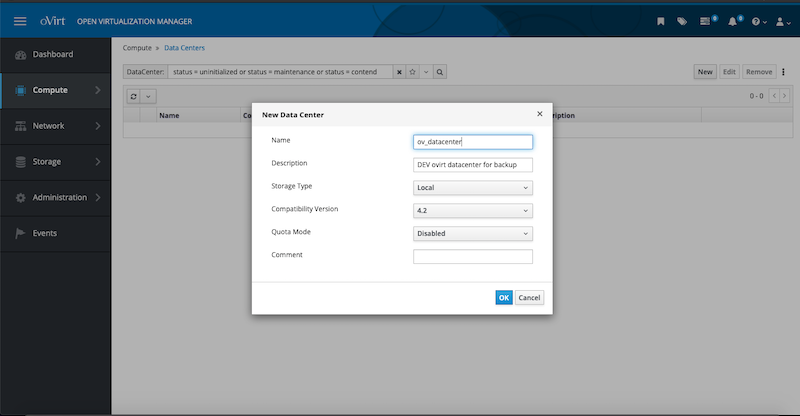
Click on New, choose a Name and a Local Storage Type.
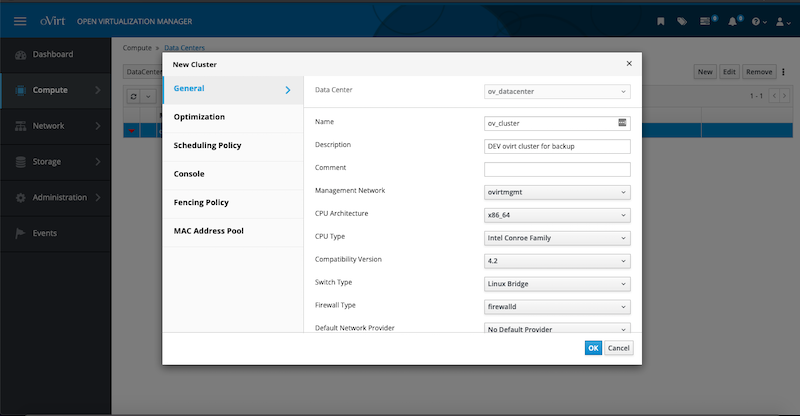
After clicking Ok, it’s Cluster’s turn!
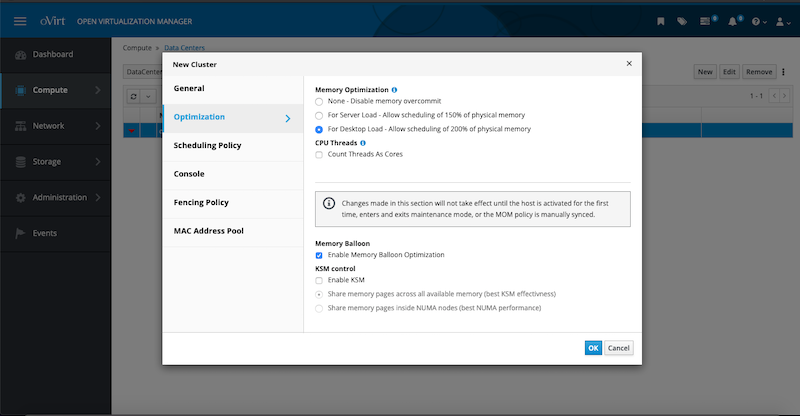
Add a Name, a Description and in the Optimization Tab choose Memory Optimization -> For Desktop Load which will allow you to overallocate memory and run more virtual machines.
Finally Enable Memory Balloon and click Ok.
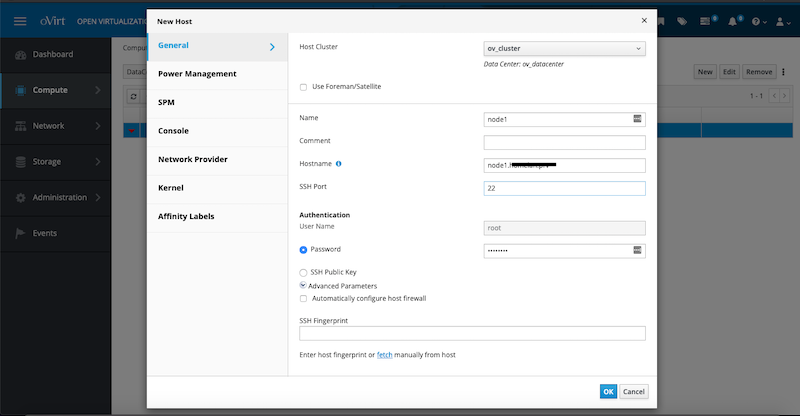
Final step will be to setup a Host.
Type a Name, an IP Address (or an FQDN as pointed out in the Prerequisites Section), the root password for the host that is going to be configured (in my case the same machine that the engine is installed) and in the Advanced Parameters deselect the Automatically configure host firewall.
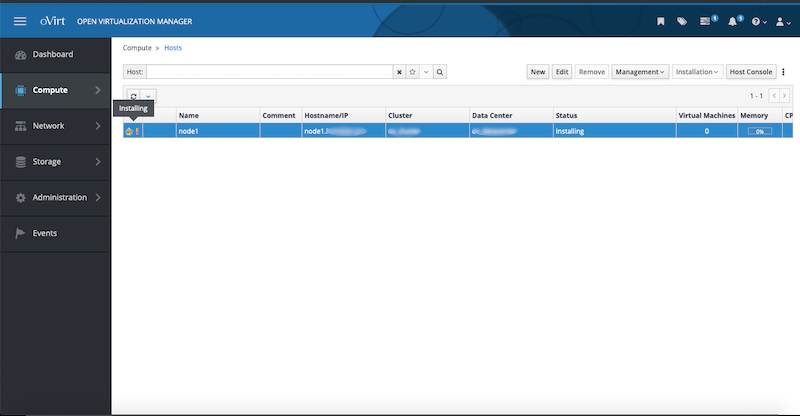
Once you click Ok, the engine will start installing apropriate packages to the configured host as shown in the Host Status.
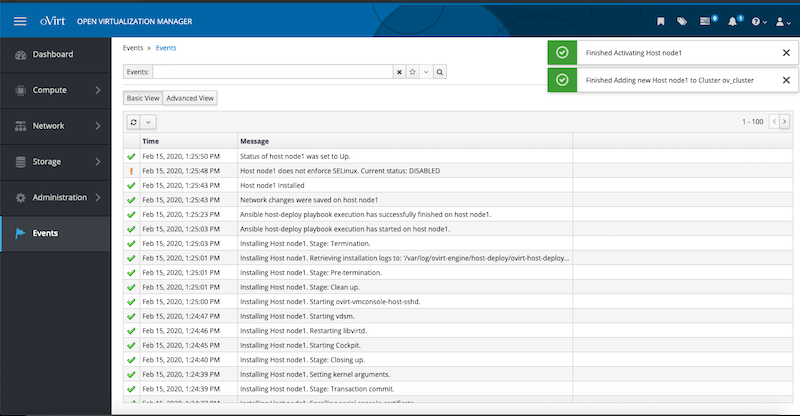
You can also see the installation progress in the Events Menu.
Once the host is ready, we have a final chapter in order to complete the basic configuration needed for creating virtual machines and this is the Storage!
oVirt Data/ISO Storage Configuration
Directly from the official oVirt documentation:
oVirt uses a centralized storage system for virtual machine disk images, ISO files, snapshots and provides three types of storage domains:
- Data Domain: A data domain holds the virtual hard disks and OVF files of all the virtual machines and templates in a data center. In addition, snapshots of the virtual machines are also stored in the data domain.
- ISO Domain: ISO domains store ISO files (or logical CDs) used to install and boot operating systems and applications for the virtual machines. An ISO domain removes the data center’s need for physical media. An ISO domain can be shared across different data centers. ISO domains can only be NFS-based. Only one ISO domain can be added to a data center.
- Export Domain: Export domains are temporary storage repositories that are used to copy and move images between data centers and oVirt environments. Export domains can be used to backup virtual machines. An export domain can be moved between data centers, however, it can only be active in one data center at a time. Export domains can only be NFS-based. Only one export domain can be added to a data center.
If you need more information head to the official Storage Chapter. For our case we will skip the Export Domain for now and will only create the Data and ISO domains.
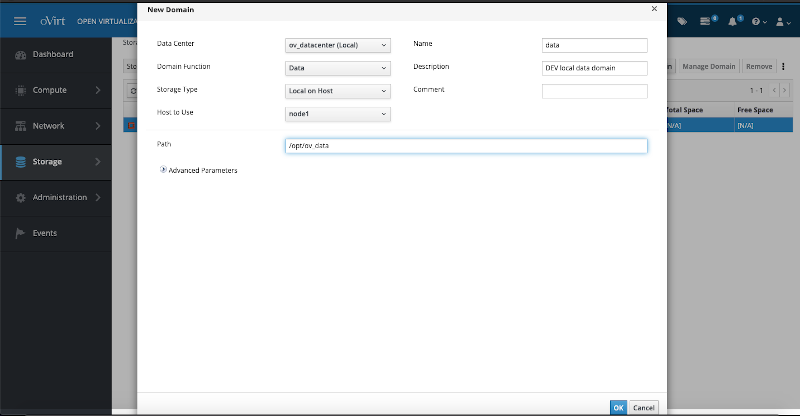
Navigate to Storage and click on New Domain.
Choose Data as a Domain Function, Local on Host as Storage Type, add a Name and finally the Path which is already created in the Prerequisites Section, /opt/ovirt_data.
Do the same for iso domain but choose ISO for a Domain Function and change the path to /opt/ovirt_iso.
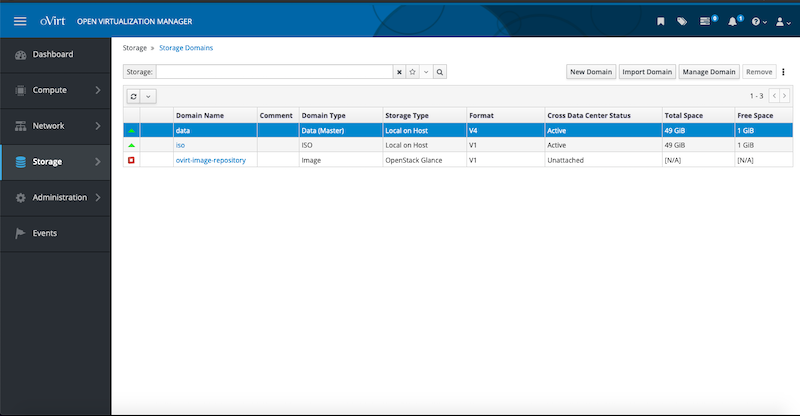
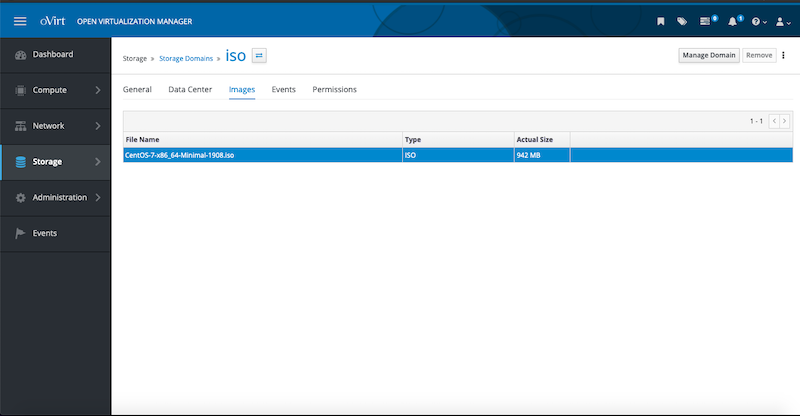
Check that both data and iso domains are Active, then click on the newly iso created domain and then choose Images Tab.
If everything is correct then you should be able to see the iso that we have already uploaded in the Prerequisites Section!
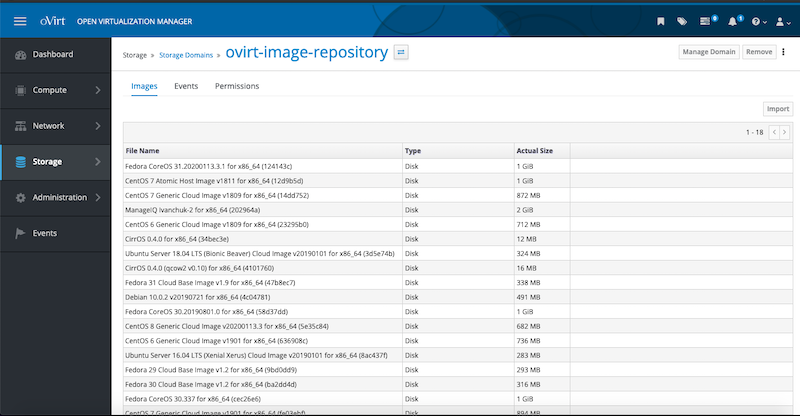
In case you don’t want to upload any iso file, you can also check the ovirt-image-repository domain which as the name clearly states is a repository that contains images from all major distributions (CentOS,Fedora,Ubuntu,Debian etc) that are ready to be exported as virual machines.
The first part of the tutorial is finished and oVirt is now configured and ready to host new kick-ass virtual machines!!
Final Words
Rome wasn’t built in a day, right?
Time to take a break and familiarize with your new infrastructure. Get confortable with all the available tabs and configuration options, before moving to Part Two which will show you how to create your first Virtual Machine and save it as a Template for future use!
Thanks for reading, until the next post and as Dr Wallace Breen says in Half-Life 2.. Be wise. Be safe. Be aware!
Subscribe via RSS


